

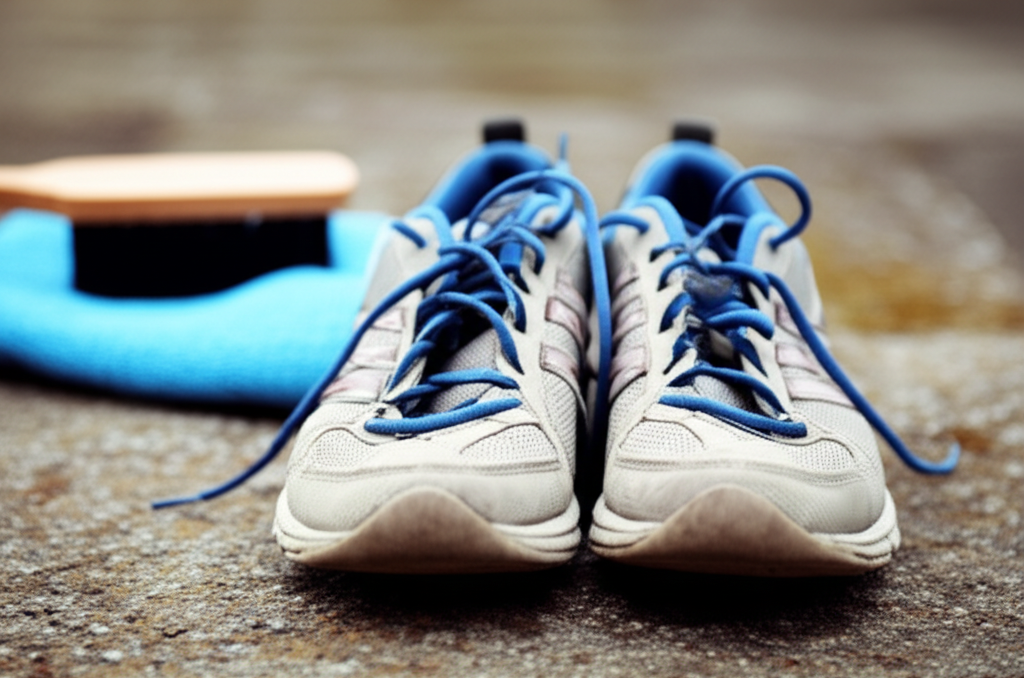
Yes, you can easily clean outdoor shoes that have been left outside, even those with tough dirt and stains. This guide provides an effortless fix using common household items and simple steps to restore your footwear.
Key Takeaways
- Gather essential cleaning supplies before starting.
- Remove loose dirt and debris with a brush.
- Wash uppers gently with soap and water.
- Clean laces and insoles separately for thoroughness.
- Air dry shoes completely to prevent damage.
- Address stubborn stains with specialized cleaners.
How to Clean Outdoor Shoes: Effortless Fix
Your favorite outdoor shoes have seen better days. Maybe they’ve been left out in the rain, gathered dust from a hike, or simply endured a season of neglect. It’s easy to feel overwhelmed by the dirt and grime, wondering if they’re beyond saving. But don’t worry! Cleaning outdoor shoes that have been left outside doesn’t have to be a chore. With a few simple tools and a bit of know-how, you can bring them back to life. This guide will walk you through an effortless fix, step by step, so you can enjoy your clean, fresh footwear again.
Let’s dive into how to make your outdoor shoes look and feel like new.
Why Cleaning Outdoor Shoes Matters
Outdoor shoes are our workhorses. They protect our feet on trails, keep us comfortable during yard work, and are often our go-to for casual outings. Over time, they collect dirt, mud, grass stains, and even odors. If left uncleaned, this buildup can not only make your shoes look unappealing but can also shorten their lifespan. Dirt and debris can break down materials, and moisture trapped inside can lead to mold and mildew. Regularly cleaning your outdoor shoes is essential for maintaining their appearance, comfort, and durability. It’s a simple act of care that pays off by keeping your footwear functional and stylish for longer.
Gathering Your Essential Cleaning Supplies
Before you start scrubbing, it’s crucial to have the right tools. Having everything ready will make the cleaning process much smoother and more effective. You likely already have most of these items around your home.
The Must-Have Cleaning Kit:
- Soft-bristled brush: An old toothbrush or a dedicated shoe brush works wonders for scrubbing away dirt without damaging materials.
- Stiff-bristled brush: For tougher mud and grime, especially on soles.
- Mild soap or detergent: Dish soap or a gentle laundry detergent is usually perfect. Avoid harsh chemicals.
- Clean cloths: Microfiber cloths are ideal for wiping and drying.
- Bowl of lukewarm water: For mixing your cleaning solution and rinsing.
- Shoe trees or stuffing: To help shoes maintain their shape while drying. Newspaper or paper towels can also work.
- Optional: Baking soda: Great for odor absorption.
- Optional: White vinegar: Can help with tough stains and odors.
- Optional: Specialized shoe cleaner: For specific materials or stubborn stains.
Having these items on hand ensures you’re prepared for any cleaning challenge your outdoor shoes might present.
Step-by-Step Guide: How to Clean Outdoor Shoes That Have Been Left Outside
Cleaning outdoor shoes, especially those that have endured the elements, requires a methodical approach. Follow these steps to ensure a thorough and safe cleaning process for most types of outdoor footwear, from sturdy hiking boots to casual sneakers.
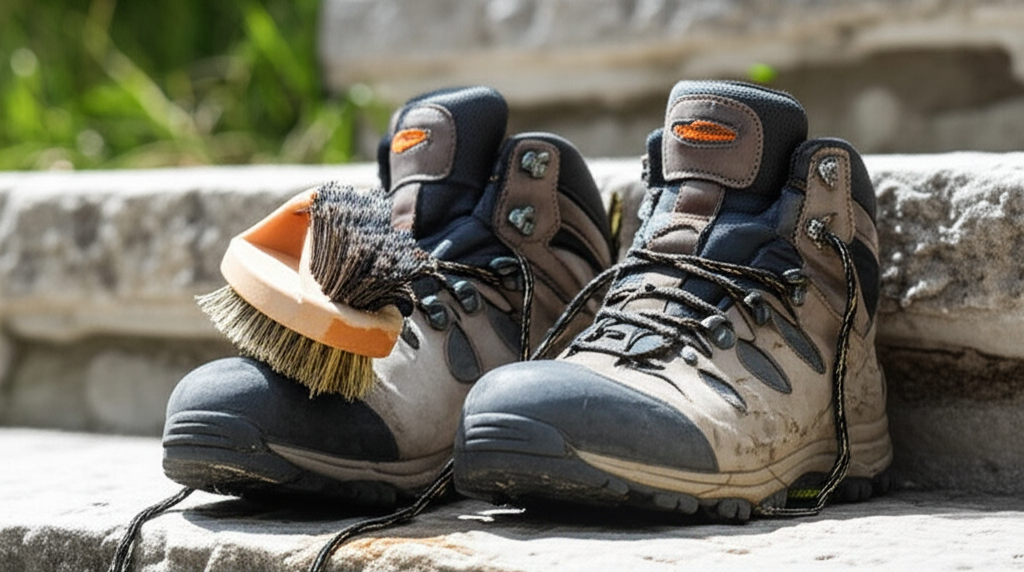
Step 1: Remove Loose Dirt and Debris
The first and most important step is to get rid of all the surface dirt. If your shoes are caked in mud, let them dry slightly first. This makes it easier to brush off. Take your shoes outside or place them over a trash can to avoid making a mess indoors. Use your stiff-bristled brush to vigorously brush off all loose dirt, mud, grass, and any other debris from the uppers, soles, and even the eyelets.
Don’t forget to bang the soles together to dislodge anything stuck in the treads. Pay close attention to the nooks and crannies where dirt loves to hide.
Step 2: Clean the Laces and Insoles
Laces and insoles can harbor a lot of dirt and odor. It’s best to clean them separately. Remove the laces and insoles from your shoes. You can hand-wash the laces in a sink with warm, soapy water. Rub them together to remove grime, then rinse them thoroughly. For insoles, you can usually wipe them down with a damp cloth and a little soap. If they are particularly dirty or smelly, you can soak them in a mild detergent solution and then rinse them. For stubborn odors on insoles, a sprinkle of baking soda left overnight can work wonders.
Step 3: Prepare Your Cleaning Solution
For most shoes, a simple and effective cleaning solution can be made with mild soap and lukewarm water. Mix a small amount of gentle laundry detergent or a few drops of dish soap into a bowl of warm water. You want just enough soap to create a mild lather, not an excessive amount. If your shoes are made of a material that might be sensitive, like certain synthetics or lightly colored mesh, using just plain water with a soft cloth might be a safer starting point.
Step 4: Scrub the Uppers and Midsoles
Dip your soft-bristled brush into the soapy water. Gently scrub the uppers of your shoes. Work in small sections, using circular motions. For mesh or fabric shoes, be gentle to avoid snagging or tearing. For more durable materials like leather or synthetic leather, you can apply a little more pressure. Pay special attention to any stained areas. The midsole, the layer between the upper and the outsole, often collects scuff marks. Use your brush to clean these areas as well.
If you encounter very stubborn dirt or scuff marks, you might need to use a slightly stiffer brush or a dedicated shoe cleaner. For white midsoles that are notoriously difficult to keep clean, a magic eraser or a paste made from baking soda and water can be very effective. Always test any new cleaning product on an inconspicuous area first.
Step 5: Rinse Thoroughly
After scrubbing, it’s crucial to remove all the soap residue. Dampen a clean cloth with plain water and wipe down the uppers to rinse away the soap. You can also use a separate clean brush dipped in plain water to gently brush away any remaining suds. Ensure no soap is left behind, as dried soap residue can attract more dirt and potentially damage the shoe materials over time.
Step 6: Clean the Outsoles
The outsoles, especially the treads, are designed to grip but also to trap mud and debris. Use your stiff-bristled brush, perhaps with a bit of the soapy water, to scrub the outsoles thoroughly. Get into all the grooves to remove any embedded dirt. For very tough grime, a little bit of an old toothbrush can be helpful for getting into tight spaces. Once you’ve scrubbed them clean, wipe them down with a damp cloth.
Step 7: Dry Your Shoes Properly
This is a critical step that many people get wrong. Never put your outdoor shoes in a dryer or expose them to direct heat (like a radiator or direct sunlight), as this can cause materials to warp, crack, or shrink. Instead, allow your shoes to air dry naturally at room temperature. Stuff the shoes loosely with newspaper, paper towels, or shoe trees. This helps absorb excess moisture from the inside and aids in maintaining their shape. Change the stuffing material if it becomes saturated. Drying can take 24 hours or longer, depending on how wet the shoes are and the ambient humidity. Patience here is key to preserving your footwear.
Step 8: Reassemble and Freshen Up
Once your shoes are completely dry, reinsert the clean, dry insoles and thread the clean laces back through the eyelets. If you notice any lingering odors, you can place a sachet of baking soda inside each shoe overnight. You can also use specialized shoe deodorizers. If your shoes have leather components, you might want to apply a leather conditioner after they are dry to restore moisture and protect the material.
Caring for Different Shoe Materials
Not all outdoor shoes are created equal. The materials they are made from will influence the best cleaning methods. Here’s a quick guide to common materials:
1. Synthetic Mesh and Fabric
These are common in athletic and casual outdoor shoes. They are generally durable but can be prone to staining and snagging.
- Cleaning: Mild soap and water are best. Use a soft brush. Avoid harsh scrubbing.
- Drying: Air dry thoroughly, stuffed to maintain shape.
- Pro Tip: For white mesh, a paste of baking soda and hydrogen peroxide can help lift yellowing or stains. Always test first!
2. Leather and Synthetic Leather
Found in hiking boots, work boots, and some casual shoes. Leather requires specific care to prevent drying and cracking.
- Cleaning: Wipe with a damp cloth. For dirt, use a mild soap solution and a soft brush. For stubborn marks, a leather cleaner is recommended.
- Drying: Air dry away from heat. Stuff with paper to absorb moisture.
- Post-Cleaning: Apply a leather conditioner to keep it supple and protected. Avoid soaking leather shoes.
3. Suede and Nubuck
These materials are more delicate and prone to water spots and stains. They require special care.
- Cleaning: Use a specialized suede brush to remove dry dirt. For stains, use a suede eraser or a suede cleaner. Avoid water as much as possible. If they get wet, let them air dry naturally and then brush them to restore the nap.
- Drying: Always air dry. Never use heat.
- Prevention: A suede protector spray is highly recommended for outdoor use.
4. Rubber and Waterproof Materials
Common in rain boots, some hiking shoe components, and waterproof membranes.
- Cleaning: Usually the easiest to clean. Wipe down with soap and water. A good scrub brush can handle mud.
- Drying: Wipe dry with a cloth. Air dry any interior padding.
- Maintenance: For rubber, occasional conditioning with a rubber protectant can prevent cracking.
Understanding your shoe’s material is key to preventing damage during cleaning. When in doubt, always opt for the gentlest method.
Tackling Stubborn Stains and Odors
Sometimes, regular cleaning isn’t enough. Outdoor shoes can pick up persistent stains and develop unpleasant odors. Here are some effective solutions:
Dealing with Tough Stains
Mud and Dirt: As covered, letting it dry and brushing is the first step. For dried-in mud, a paste of baking soda and water, left to sit for a bit before scrubbing, can help lift it.
Grass Stains: These can be tricky. For fabric shoes, try a pre-wash stain remover designed for laundry, or a paste of white vinegar and water. For leather, a specialized leather degreaser might be needed.
Oil and Grease: For these, cornstarch or baking soda can be a lifesaver. Sprinkle a generous amount over the stain, let it sit for several hours (or overnight) to absorb the oil, then brush it off. Repeat if necessary, then clean with mild soap and water.
Scuff Marks: On rubber soles or smooth surfaces, a magic eraser is often very effective. For leather, a shoe polish of the matching color can cover scuffs.
Eliminating Unpleasant Odors
Baking Soda: The go-to for odor absorption. Sprinkle baking soda inside the shoes and let it sit overnight, then vacuum or shake it out. You can also put baking soda in old socks or porous bags and place them inside the shoes.
White Vinegar: Dilute white vinegar with water (1:1 ratio) and lightly spray the inside of the shoes. Let them air dry completely. The vinegar smell will dissipate as it dries, taking odors with it.
Sunlight: Sometimes, simply airing shoes out in direct sunlight for a few hours can help kill odor-causing bacteria. Be cautious with this for colored materials, as prolonged sun exposure can cause fading.
Activated Charcoal Inserts: These are commercially available and highly effective at absorbing moisture and odors from shoes.
For persistent issues, consider specialized shoe cleaners and deodorizers available at shoe stores or online retailers. Always remember to test any new product on a small, inconspicuous area first.
Table: Common Outdoor Shoe Cleaning Mistakes to Avoid
Preventing common mistakes can save your shoes from damage and ensure a better cleaning outcome. Here are a few things to steer clear of:
| Mistake | Why it’s a Problem | The Better Approach |
|---|---|---|
| Using a washing machine for most shoes | Can damage delicate materials, adhesives, and shoe structure. | Hand wash with mild soap and water. |
| Drying shoes with direct heat (dryer, radiator, sun) | Causes materials to warp, crack, shrink, or become brittle. | Air dry at room temperature, stuffed to maintain shape. |
| Using harsh chemicals (bleach, ammonia) | Can discolor, degrade, or permanently damage shoe materials. | Opt for mild soap, specialized cleaners, or natural remedies. |
| Soaking leather or suede shoes | Can lead to water damage, stains, and loss of material integrity. | Clean with damp cloths and appropriate cleaners; dry immediately. |
| Not cleaning laces and insoles | They harbor dirt and odors, making the whole shoe feel unclean. | Remove and wash them separately for a complete clean. |
Pro Tips for Extended Shoe Life
Maintaining your outdoor shoes goes beyond just cleaning. A few extra steps can significantly extend their lifespan and keep them looking great.
- Rotate Your Footwear: If you have multiple pairs of outdoor shoes, try not to wear the same pair every single day. Rotating allows shoes to dry out completely between wears, preventing moisture buildup and odor.
- Protect Them: For leather and suede, invest in waterproofing sprays or conditioners. For fabric shoes, a stain-repellent spray can offer an extra layer of protection against spills and dirt. Reapply these treatments periodically, especially after cleaning.
- Store Them Properly: When not in use, store your shoes in a cool, dry place away from direct sunlight. Shoe trees or stuffing them with paper can help them retain their shape. Avoid cramming them into tight spaces where they can get crushed.
- Address Damage Promptly: If you notice a loose sole, a tear, or a worn-down heel, address it as soon as possible. Small repairs can often prevent more significant damage and costly replacements down the line. Many shoe repair shops can help with this.
- Know When to Replace: Even with the best care, shoes eventually wear out. Look for signs like worn-out tread, broken-down cushioning, or structural damage that compromises support and comfort.
These simple practices, combined with regular cleaning, will ensure your outdoor shoes serve you well for seasons to come.
Frequently Asked Questions (FAQ)
Q1: Can I use a washing machine to clean my outdoor shoes?
For most outdoor shoes, especially those with leather, suede, or delicate mesh, it’s best to avoid the washing machine. The agitation can damage glues, warp materials, and break down the shoe’s structure. Hand washing with mild soap and water is a much safer and more effective method.
Q2: How do I dry my shoes if they are very wet?
If your shoes are soaked, remove as much excess water as possible by squeezing gently. Then, stuff them loosely with newspaper, paper towels, or clean rags. Replace the stuffing material as it becomes damp. Allow them to air dry completely at room temperature, away from any heat sources. This process can take 24-48 hours.
Q3: My white shoes have yellow stains on them. How can I fix this?
Yellowing on white shoes can be caused by various factors, including oxidation or residue from cleaning agents. A paste made from baking soda and a small amount of hydrogen peroxide can often lift these stains. Apply the paste, let it sit for about 30 minutes, then gently scrub with a soft brush and rinse thoroughly. Always test this mixture on an inconspicuous area first.
Q4: Are there specific cleaners for different shoe materials?
Yes, and using them is recommended for best results and material longevity. For instance, specialized cleaners exist for leather, suede, nubuck, and even technical fabrics. These are formulated to clean effectively without stripping natural oils (for leather) or damaging the delicate nap (for suede). Always follow the product instructions.
Q5: How often should I clean my outdoor shoes?
The frequency depends on how often you wear them and the conditions they’re exposed to. For shoes worn frequently on trails or in muddy conditions, cleaning after each use is ideal. For casual wear, a thorough clean every few weeks or when they start to look visibly dirty is usually sufficient. Regular spot cleaning for minor marks will also help.
Q6: Can I use regular household cleaners on my shoes?
It’s generally best to stick to mild soap (like dish soap or gentle laundry detergent) or specialized shoe cleaners. Harsh household cleaners, bleach, or abrasive detergents can damage shoe materials, remove color, and weaken adhesives. Always check the shoe’s care label if available, or test any cleaner on a small, hidden area first.
Conclusion
Keeping your outdoor shoes clean and well-maintained is a straightforward process when you have the right approach. By following these step-by-step instructions, gathering your essential supplies, and understanding the nuances of different shoe materials, you can effectively tackle dirt, stains, and odors. Remember that patience, especially during the drying process, is key to preserving your footwear. With a little effort, you can ensure your outdoor shoes remain comfortable, functional, and stylish for many adventures to come. Don’t let dirt deter you; embrace these cleaning techniques and give your favorite outdoor companions the care they deserve.