

Effortlessly restore the shine to your shoe soles with simple, effective cleaning methods. Learn how to clean shoe soles to make them look new again, extending their life and keeping your footwear looking its best.
Key Takeaways
- Restore white shoe soles with ease.
- Tackle tough grime and scuffs effectively.
- Learn gentle methods for delicate materials.
- Extend the life of your favorite footwear.
- Achieve a like-new shine with common household items.
- Maintain your shoes for lasting style and comfort.
How to Clean Shoe Soles: Effortless Shine for Every Pair
Your shoe soles see a lot of action. They’re the unsung heroes that keep you grounded, protecting your feet from the ground beneath. Over time, though, they collect dirt, scuffs, and grime, making even the freshest shoes look a little tired. Wondering how to clean shoe soles so they look their best? You’re not alone. Many people find this task a bit daunting, unsure of the best methods or worried about damaging their shoes. But don’t fret! Cleaning your shoe soles is simpler than you might think, and with the right approach, you can bring back that effortless shine. This guide will walk you through easy, effective techniques for all types of shoe soles, so you can keep your favorite pairs looking fantastic.
Why Cleaning Your Shoe Soles Matters
Keeping your shoe soles clean isn’t just about aesthetics. While a fresh sole certainly makes your shoes look better, there are other benefits too. Dirt and debris can sometimes wear down the sole material over time, especially if it’s a softer rubber. Regular cleaning also prevents grime from transferring to the upper part of your shoe, which can be harder to clean. For white or light-colored soles, yellowing and stubborn stains can be particularly frustrating. Learning how to clean shoe soles effectively means you can revive them, making your shoes look newer for longer. This saves you money by extending the life of your footwear and keeps you stepping out in style.
Gathering Your Cleaning Arsenal: Essential Tools
Before you start, it’s helpful to have a few basic supplies on hand. You probably already own most of these! Having the right tools makes the process smoother and more effective.
Commonly Used Cleaning Supplies:
- Soft-bristled brush: An old toothbrush is perfect for this. A dedicated shoe brush also works well.
- Microfiber cloths: For wiping away dirt and drying.
- Mild soap or detergent: Dish soap or laundry detergent are good options.
- Water: Lukewarm water is usually best.
- Magic Eraser (Melamine Foam): Excellent for scuffs on rubber soles.
- Baking soda: A natural abrasive and deodorizer.
- White vinegar: Useful for stubborn stains and deodorizing.
- Rubbing alcohol: For tougher stains or disinfecting.
- Toothpaste (non-gel, white): A mild abrasive for cleaning.
Step-by-Step Guide: How to Clean Shoe Soles
The method you choose will depend on the type of sole and the kind of dirt you’re dealing with. Here’s a breakdown of common techniques.
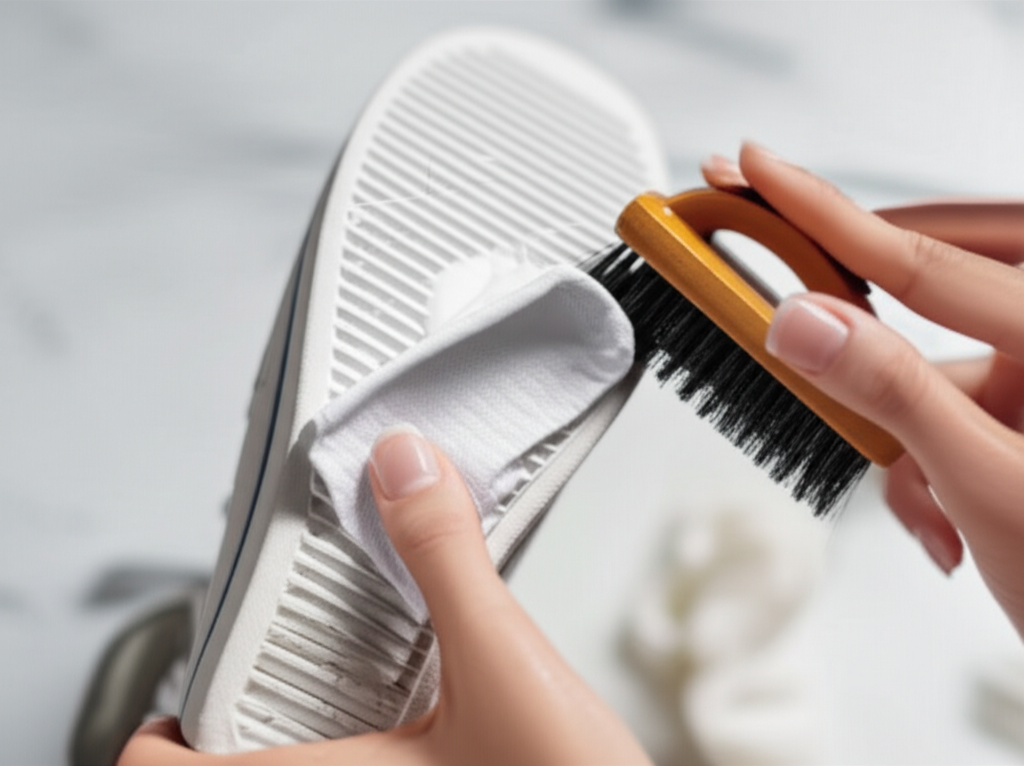
1. The Basic Clean: Soap and Water
This is your go-to method for everyday dirt and grime. It’s gentle enough for most soles and requires minimal supplies.
- Remove Loose Dirt: First, bang your shoes together outside or use a dry brush to knock off any loose dirt, mud, or debris.
- Prepare Cleaning Solution: Mix a few drops of mild dish soap or laundry detergent with lukewarm water in a small bowl.
- Scrub the Soles: Dip your soft-bristled brush into the soapy water. Gently scrub the soles of your shoes in a circular motion. Pay attention to textured areas or grooves where dirt tends to accumulate.
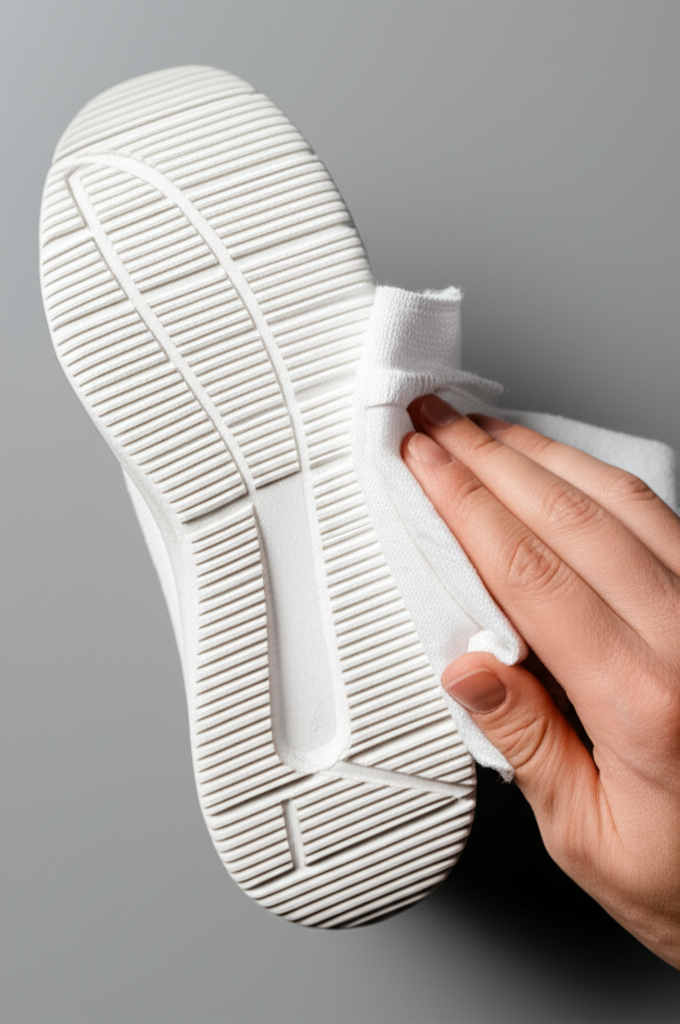
- Wipe Clean: Use a damp microfiber cloth to wipe away the soap and loosened dirt. Rinse the cloth as needed.
- Dry: Pat the soles dry with a clean, dry microfiber cloth. Allow the shoes to air dry completely before wearing them.
2. Tackling Scuffs and Stubborn Marks: Magic Eraser Method
For those annoying black scuff marks, especially on white rubber soles, a magic eraser (melamine foam) is a game-changer. These erasers work by being a very fine-grit sandpaper, gently abrading away the mark.
- Dampen the Eraser: Lightly wet a section of your Magic Eraser with water. Squeeze out any excess water so it’s damp, not soaking.
- Gently Rub: Rub the damp eraser over the scuff marks on the shoe sole. Use moderate pressure, focusing on the marked areas. You should see the scuff marks disappear as you rub.
- Wipe Away Residue: Use a clean, damp microfiber cloth to wipe away any residue left behind by the eraser.
- Dry: Let the soles air dry completely.
Important Note: While effective, Magic Erasers are abrasive. Always test on an inconspicuous area first, and use gentle pressure, especially on painted or colored sole accents, to avoid removing any color.
3. Deeper Cleaning: Baking Soda Paste
Baking soda is a fantastic natural cleaner. It’s a mild abrasive that can lift dirt and also help with odors.
- Make the Paste: In a small bowl, mix baking soda with a little water to create a thick paste. Aim for a consistency similar to toothpaste.
- Apply to Soles: Using your brush or an old cloth, apply the baking soda paste directly to the shoe soles.
- Scrub: Let the paste sit for about 10–15 minutes. Then, use your soft-bristled brush to scrub the soles thoroughly.
- Rinse and Wipe: Wipe away the paste and dirt with a damp microfiber cloth. You may need to rinse the cloth multiple times.
- Dry: Allow the shoes to air dry completely.
4. For Yellowed Soles: Toothpaste or Hydrogen Peroxide
Yellowing on white rubber soles can be caused by oxidation or UV exposure. While sometimes permanent, these methods can often lighten or remove the yellowing.
Method A: White Toothpaste (Non-Gel)
- Apply Toothpaste: Squeeze a generous amount of white, non-gel toothpaste directly onto the yellowed areas of the sole.
- Scrub: Use a toothbrush to scrub the toothpaste into the yellowed areas. Work it into any textured parts of the sole.
- Let it Sit: Allow the toothpaste to sit on the soles for about 10–15 minutes.
- Wipe and Rinse: Wipe off the toothpaste with a damp cloth. Rinse the cloth and repeat until all toothpaste residue is gone.
- Dry: Air dry the soles.
Method B: Hydrogen Peroxide (Use with Caution)
Hydrogen peroxide is a mild bleaching agent. It can be effective but requires careful handling and should only be used on white rubber soles.
- Prepare the Area: Work in a well-ventilated area. Wear gloves to protect your skin.
- Apply Peroxide: Dampen a cotton ball or cloth with 3% hydrogen peroxide solution. Gently dab it onto the yellowed areas of the sole. Avoid getting it on the upper parts of the shoe.
- Sunlight Boost (Optional): For enhanced results, place the shoe in direct sunlight for a few hours. The UV rays can help activate the peroxide’s bleaching properties.
- Wipe and Rinse: After the time is up or after sun exposure, wipe the soles thoroughly with a damp cloth to remove all peroxide residue.
- Dry: Let the shoes air dry completely.
Caution: Hydrogen peroxide can degrade certain materials if left on too long or used too frequently. Always test in a small area first and rinse thoroughly.
5. Dealing with Tough Stains and Mud
For deeply ingrained dirt or mud that has dried on, you might need a slightly more robust approach. Sometimes, a combination of methods works best.
- Soak (Optional): For very muddy shoes, you can briefly soak the soles in a basin of water to loosen the mud. Avoid soaking the entire shoe, especially if it’s made of delicate materials.
- Scrape Off Excess: Use a blunt object like a dull butter knife or an old credit card to gently scrape away as much caked-on mud or dirt as possible.
- Apply Cleaning Solution: Use the basic soap and water method, or the baking soda paste, and scrub vigorously with your brush.
- Repeat if Necessary: For stubborn stains, you might need to repeat the scrubbing process or try the Magic Eraser method on any remaining marks.
- Final Wipe and Dry: Ensure all residue is wiped away, and let the shoes air dry.
Cleaning Different Types of Shoe Soles
While the general principles apply to most shoes, some materials require a bit more care.
Rubber Soles (Sneakers, Boots)
These are generally the most durable and forgiving. Most of the methods above—soap and water, baking soda paste, Magic Eraser, and toothpaste—work very well. For heavy-duty boots, a stiffer brush might be needed, but always check the sole material first.
Crepe Soles (Certain Boots, Dress Shoes)
Crepe rubber can be more porous and susceptible to staining. Use gentler methods here. Start with a mild soap and water solution and a soft brush. Avoid harsh chemicals or abrasive scrubbers, as they can damage the texture and color of crepe. A Magic Eraser can be used very gently on scuffs, but test it first.
Leather Soles (Dress Shoes)
Leather soles are less common on modern shoes and require specific care. They are more delicate and can be damaged by excessive water. For light dirt, use a slightly damp cloth. For scuffs, a leather conditioner or a very mild soap solution applied sparingly with a soft cloth is best. Avoid abrasive cleaners and prolonged exposure to water. If the soles are heavily soiled or stained, professional shoe care might be the safest option.
Translucent or Icy Soles (Some Sneakers)
These can be tricky as they show dirt very easily and can sometimes yellow. The baking soda paste method or a mild soap and water approach is best. A Magic Eraser can work, but use extreme caution and minimal pressure, as it can sometimes dull the finish or even cause minor abrasion on these materials. For yellowing, the toothpaste method is often safer than hydrogen peroxide.
Pro Tips for Maintaining Clean Shoe Soles
- Wipe Down After Use: A quick wipe with a damp cloth after wearing your shoes can prevent dirt from setting in.
- Store Properly: Keep shoes away from direct sunlight when not in use, as UV rays can contribute to yellowing. Store them in a cool, dry place.
- Regular Maintenance: Don’t wait until your soles are heavily soiled. A little cleaning often goes a long way.
- Protectant Sprays: For some materials, water and stain repellent sprays can help make future cleaning easier.
Understanding Sole Yellowing: A Deeper Look
Yellowing of shoe soles, particularly white rubber ones, is a common and often frustrating issue. It’s primarily a chemical reaction called oxidation. When the materials in the rubber, often polymers and plasticizers, are exposed to oxygen, UV light (from the sun), and sometimes even heat, they can break down. This process changes the chemical structure of the material, causing it to appear yellow or brown. It’s similar to how an apple turns brown after you cut it. While you can’t reverse oxidation completely, cleaning methods that use mild bleaching agents or abrasives can help to remove the discolored surface layer, revealing a brighter sole underneath.
For more information on material science and degradation, resources like those from the National Institute of Standards and Technology (NIST) offer insights into how materials behave over time and under various conditions.
Table: Choosing the Right Cleaning Method
Here’s a quick guide to help you select the best cleaning method based on your sole type and the problem:
| Sole Type | Common Issues | Recommended Cleaning Methods | Methods to Avoid |
|---|---|---|---|
| White Rubber (Sneakers) | Dirt, Scuffs, Yellowing | Soap & Water, Baking Soda Paste, Magic Eraser (gentle), Toothpaste (for yellowing) | Harsh solvents, excessive scrubbing with stiff brushes |
| Colored Rubber (Sneakers, Boots) | Dirt, Scuffs | Soap & Water, Baking Soda Paste (gentle) | Bleaching agents (like hydrogen peroxide), Magic Eraser (can fade color), harsh solvents |
| Translucent/Icy Soles | Dirt, Yellowing, Scuffs | Mild Soap & Water, Baking Soda Paste, Toothpaste (for yellowing) | Magic Eraser (use with extreme caution), strong chemicals, stiff brushes |
| Crepe Soles | Dirt, Stains | Mild Soap & Water (sparingly), soft brush | Harsh chemicals, abrasive cleaners, Magic Eraser, excessive water |
| Leather Soles | Dirt, Scuffs | Slightly damp cloth, Leather conditioner, very mild soap (sparingly) | Soaking in water, abrasive cleaners, harsh chemicals, Magic Eraser |
When to Call a Professional
While most shoe sole cleaning can be done at home, there are times when it’s best to seek professional help. If your shoes are particularly expensive or made of very delicate materials (like exotic leathers or intricate synthetics), a professional shoe cleaner or cobbler has the expertise and specialized tools to handle them without causing damage. Also, if you’re dealing with deep-set stains or significant discoloration that home remedies aren’t touching, a professional might be able to achieve results you can’t. It’s an investment in preserving valuable footwear.
Frequently Asked Questions (FAQ)
Q1: How often should I clean my shoe soles?
A1: For everyday shoes, a quick wipe-down after each wear or a basic soap-and-water clean every few weeks is usually sufficient. If you wear your shoes for sports or in dirty conditions, you’ll need to clean them more frequently.
Q2: Can I use bleach to clean white shoe soles?
A2: It’s generally not recommended to use straight household bleach. While it’s a powerful whitener, it can be too harsh, potentially damaging the rubber and causing it to break down or yellow even faster. Mild bleaching agents like hydrogen peroxide, used carefully, are a safer alternative.
Q3: My shoe soles are turning yellow. How do I stop it?
A3: Yellowing is often due to oxidation and UV exposure. You can try cleaning them with toothpaste or hydrogen peroxide as described above. To prevent it, store your shoes away from direct sunlight and clean them regularly to remove surface grime that can contribute to discoloration.
Q4: What’s the best way to clean the rubber treads on my boots?
A4: For deep treads on boots, a stiff-bristled brush (like a scrubbing brush or a dedicated boot brush) combined with a strong soap and water solution or a baking soda paste works well. Ensure you get into all the grooves to remove packed-in mud and dirt.
Q5: Can I put my shoes in the washing machine to clean the soles?
A5: For most shoes, especially those with rubber or synthetic soles, a gentle cycle in the washing machine (with shoe trees or stuffed with towels to maintain shape) can work. However, always remove laces and insoles first. It’s not recommended for leather, suede, or delicate shoes, and the harshness of a machine wash can sometimes damage glues or materials over time.
Q6: Are there specific cleaners for shoe soles?
A6: Yes, there are commercial shoe sole cleaners available, often found in shoe care sections of stores or online. These are formulated for specific sole materials. However, the household methods described above are very effective and often more budget-friendly.
Conclusion
Keeping your shoe soles clean is a simple yet crucial part of shoe maintenance. It not only enhances your shoes’ appearance but also helps prolong their lifespan. By understanding the different materials your soles are made of and employing the right techniques—from a basic soap and water wash to targeted treatments for scuffs and yellowing—you can easily achieve that effortless shine. With the straightforward methods outlined in this guide, you’re well-equipped to tackle dirt, grime, and stubborn marks, ensuring your footwear always looks its best. So grab your brush and cleaning supplies, and give your shoe soles the care they deserve!